
NotaryCentral can automatically thank customers and invite them to leave an honest Google review after a successful appointment. Open Settings → Email templates → Appointment completed — Thank-you & Google review to configure the message for both in-person and remote online notarization appointments.
Automation starts off. Set up your business details, check a preview, and send yourself a test before turning it on. Workspace owners can edit these settings; active members can view them and manage appointment recipients. If you use a personal account without a workspace, the settings apply to that account.
Screenshots show the web app with generic placeholder business details, a sample review link and QR code, and example participants. Replace these with your own business details. Delivery history is demonstration data.
1. Get your Google review link
On a computer, open the Google Business Profile you manage. Select Read Reviews → Get more reviews, then Copy to copy the review link. To include a QR code, right-click the QR image and select Save image as. Google describes these steps in its review link and QR code guide.
Copy the review link for your own business. The link may look like this; YOUR-BUSINESS-ID is a placeholder, so use the actual link copied from Google:
https://g.page/r/YOUR-BUSINESS-ID/review
Open your link and confirm it leads to the correct business's review form. You do not need to connect your Google account to NotaryCentral for this automation. Customers need to sign into a Google account to post a review, according to Google's review guidance.
2. Configure your business and message
Open the thank-you and review settings in NotaryCentral. Leave Automatically send after completion off while setting up.
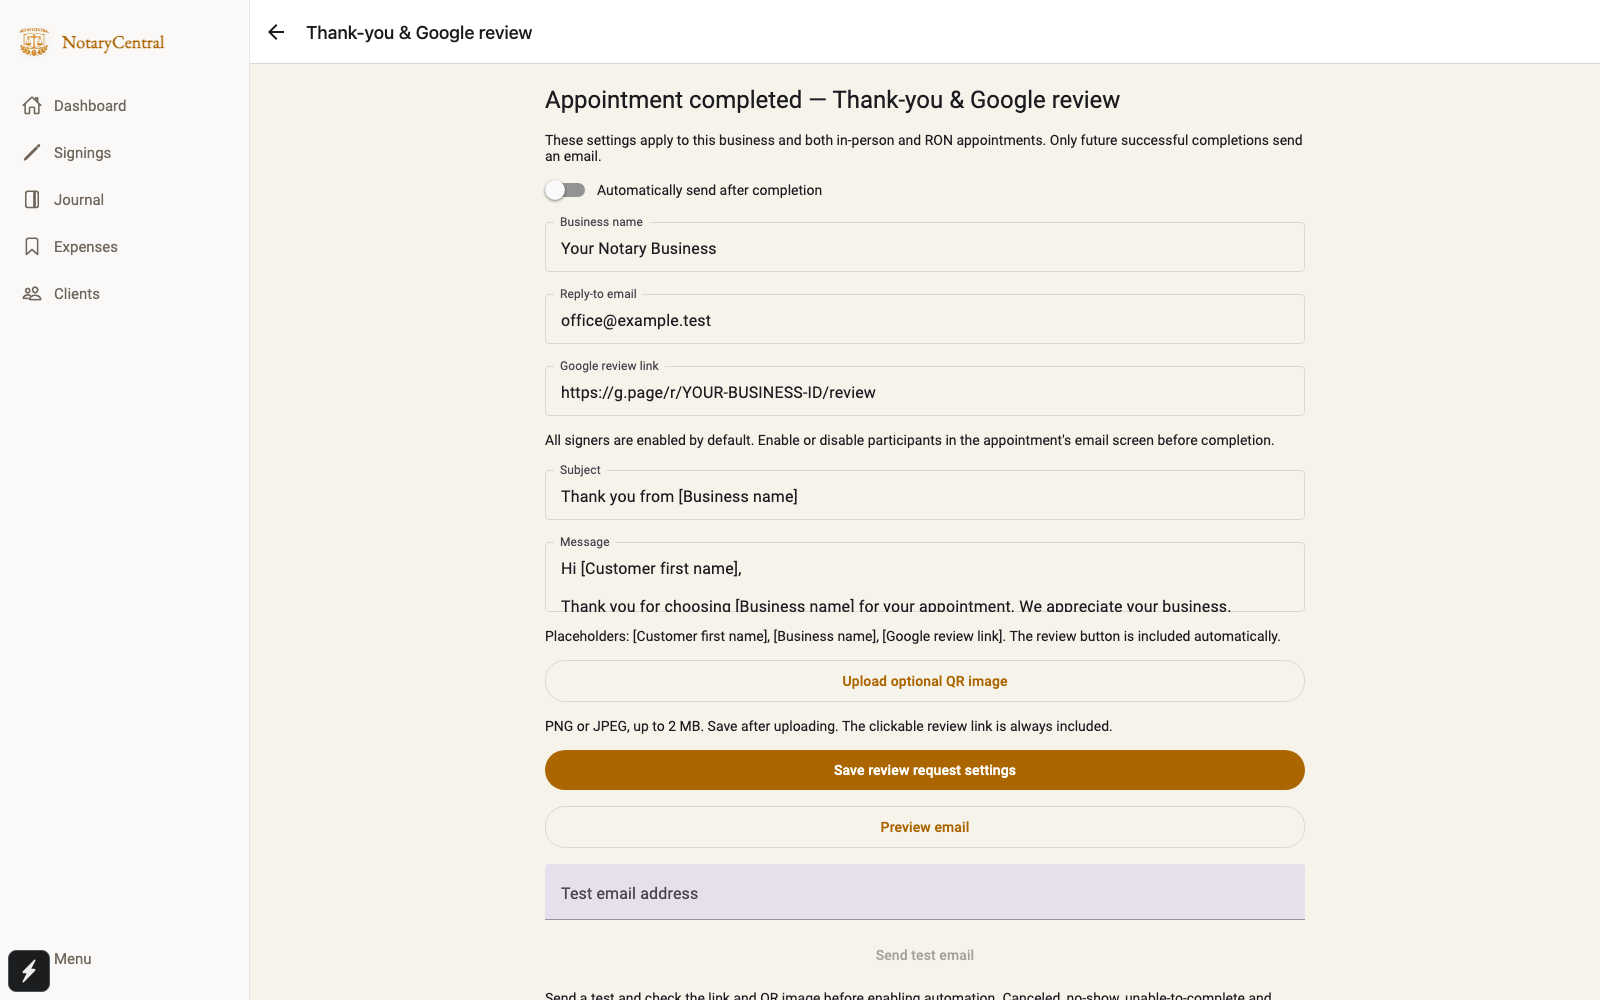
| Field | What to enter |
|---|---|
| Business name | Your business name as customers recognize it. Replace the screenshot's Your Notary Business placeholder. |
| Reply-to email | A real inbox your business monitors. Replace the screenshot's office@example.test address. |
| Google review link | Your business's HTTPS Google review link. |
| Subject | Keep Thank you from [Business name] or write your own subject. |
| Message | A short thank-you and invitation to share an honest review. |
The message supports [Customer first name], [Business name], and [Google review link]. NotaryCentral replaces these placeholders and adds the Leave us a Google review button automatically. Write the message as plain text; HTML is unnecessary.
You can use this message:
Hi [Customer first name],

Thank you for choosing [Business name] for your appointment.
We appreciate your business.

Please consider sharing an honest Google review of your experience.
Your feedback helps us improve and helps others learn about our services.

Thank you,
[Business name]
The business name appears as the sender name, and customer replies go to your configured reply-to address. Select Save review request settings.
3. Add a QR image if you want one
Select Upload optional QR image and choose a PNG or JPEG of your business's review QR code, up to 2 MB and 4096 pixels per dimension. Select Save review request settings after uploading.
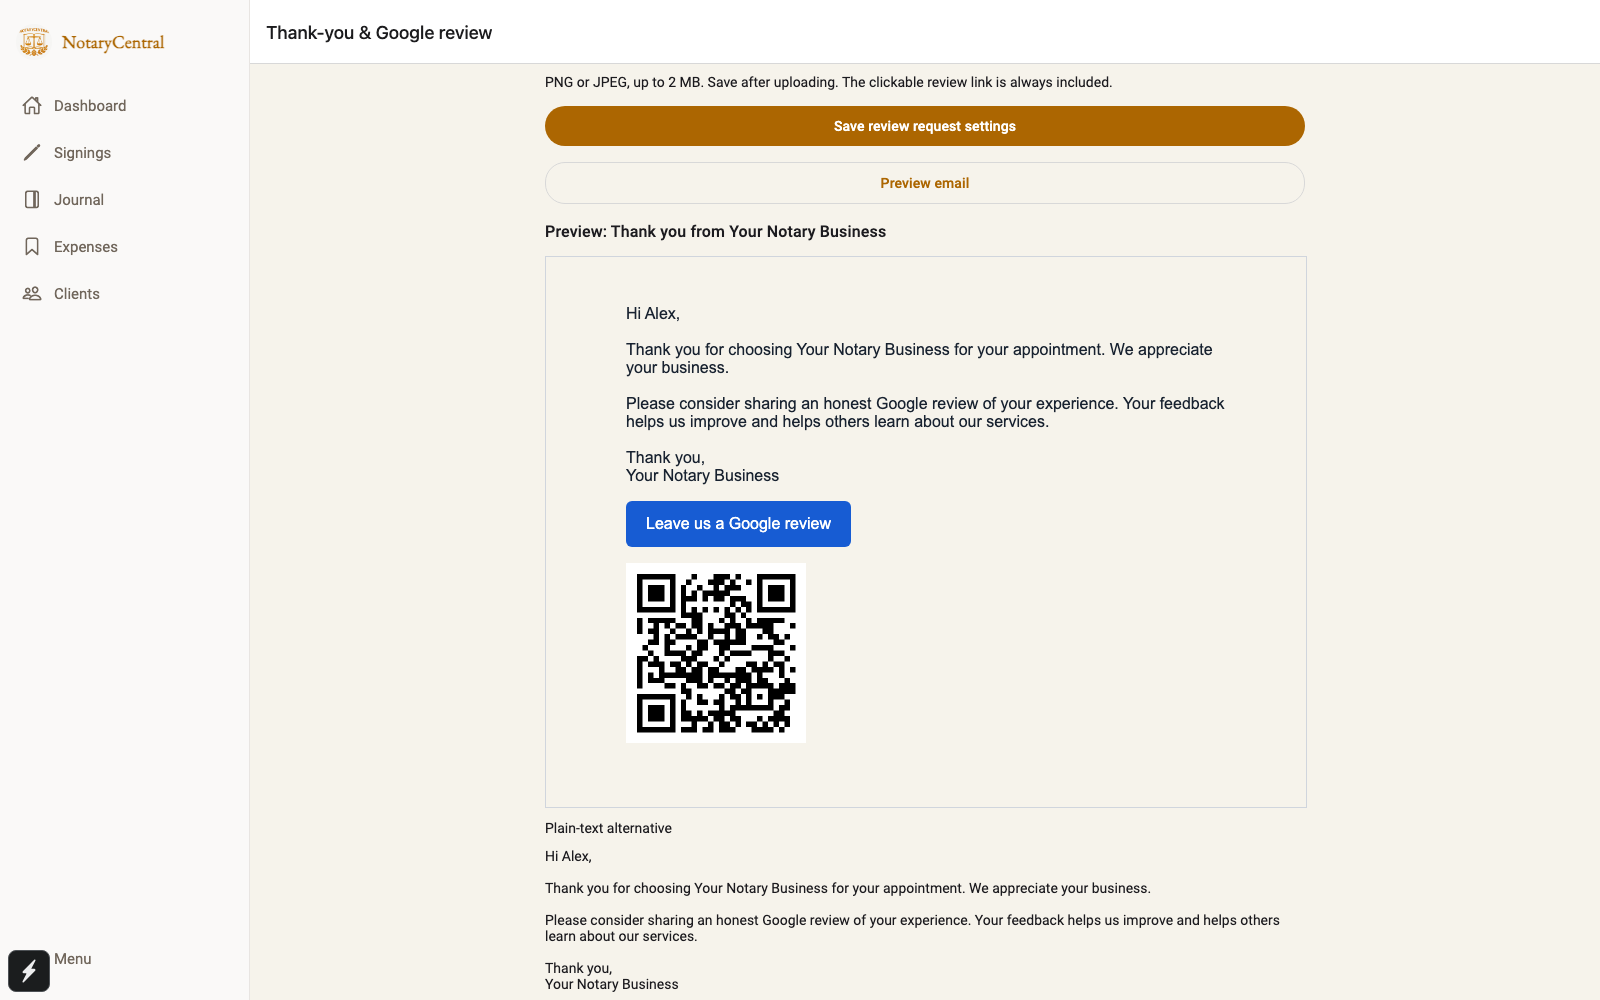
NotaryCentral uploads the image you provide; it does not create or check the QR code's destination. Scan it with a phone to confirm it opens the same business review form as your link. To remove it, select Remove QR image and save again.
The clickable review button and plain-text link remain available when you omit the QR image or an email client blocks images.
4. Preview and send a test email
Select Preview email to check the resolved subject, message, review button, optional QR image, and Plain-text alternative.
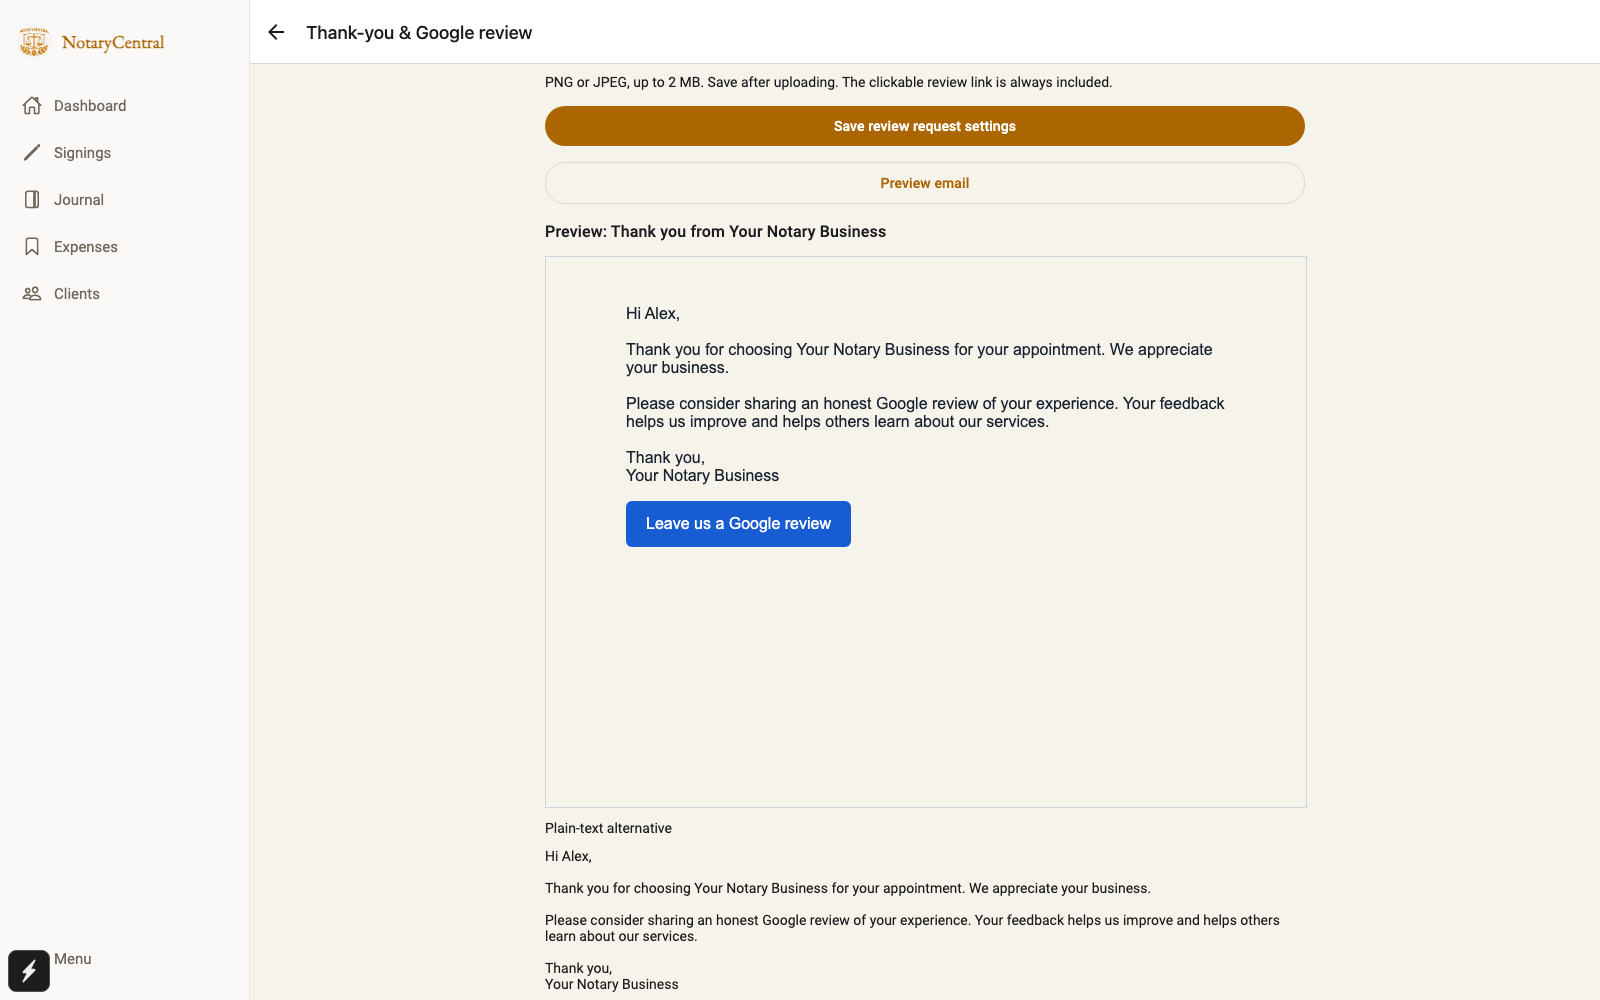
Enter an address you control in Test email address, then select Send test email. This sends a real test email to that address even while automation is off.
In the received email, check the business name, reply-to address, formatting, and review button. If you added a QR image, scan it. Check the email on your phone as well as your usual desktop email client.
5. Enable automatic sends
After the test looks right, turn on Automatically send after completion and select Save review request settings. Reopen the settings to confirm the switch remains on.
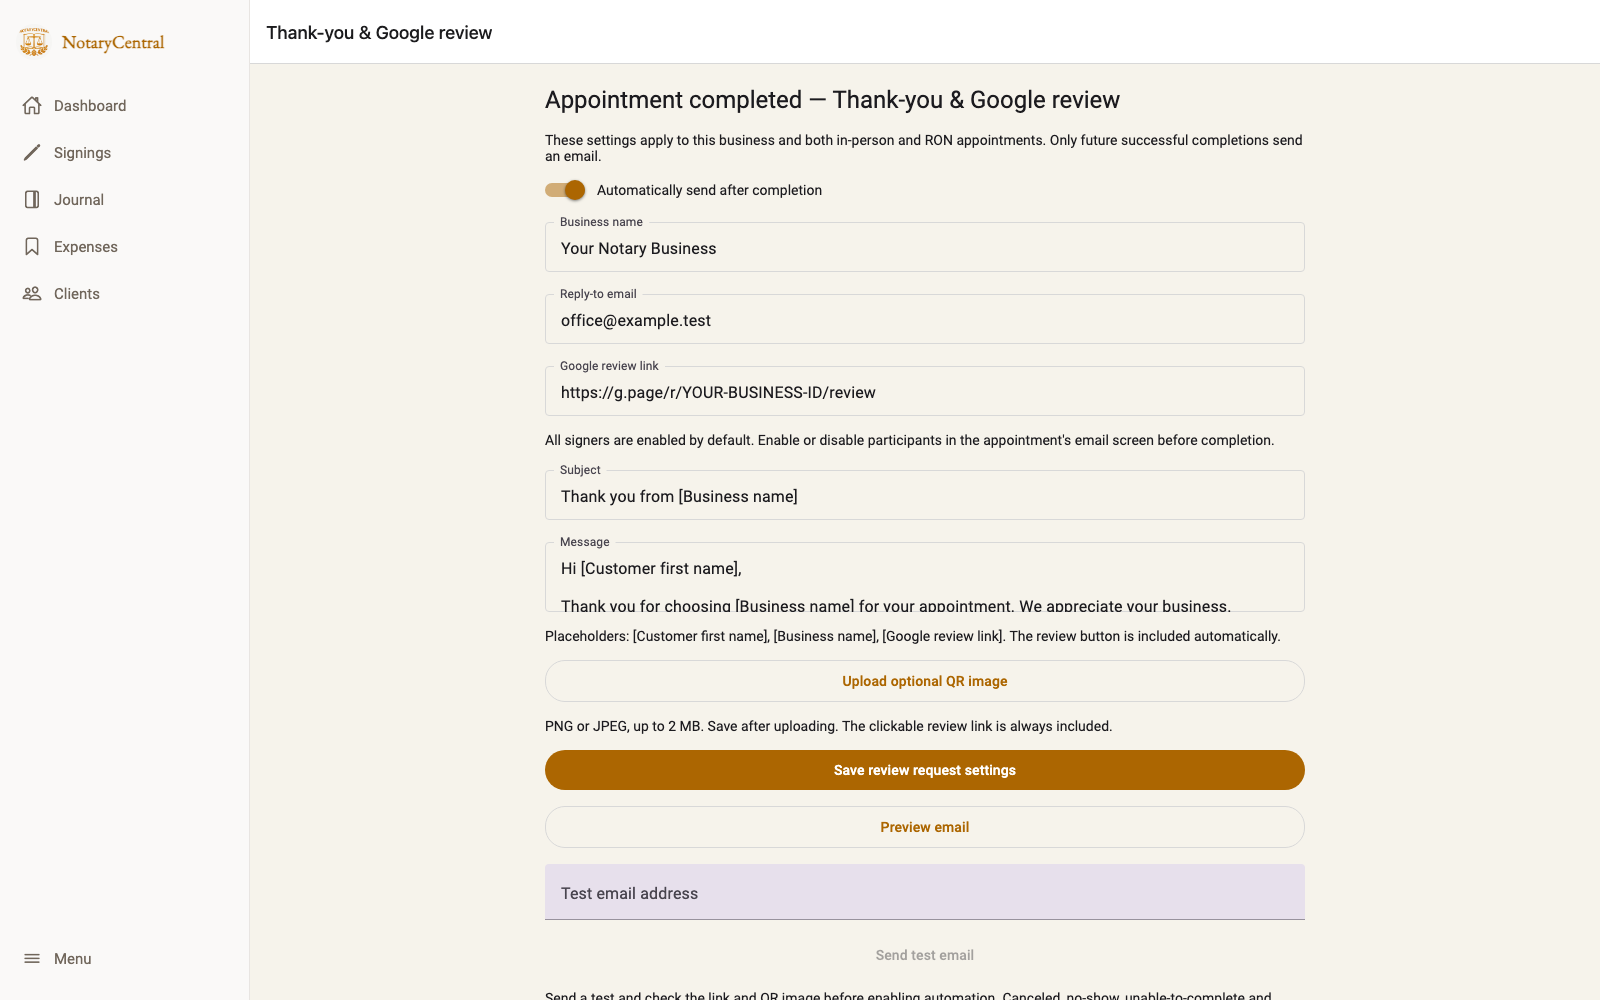
The automation applies to future transitions into Closed - Complete. It does not email a batch of previously completed appointments. Canceled, no-show, unable-to-complete, and practice appointments do not send review requests. There is no configurable delay or follow-up reminder sequence.
6. Choose recipients before completing an appointment
Open the appointment's Email screen and find Google review recipients. All signers are selected by default; other participants start unselected.
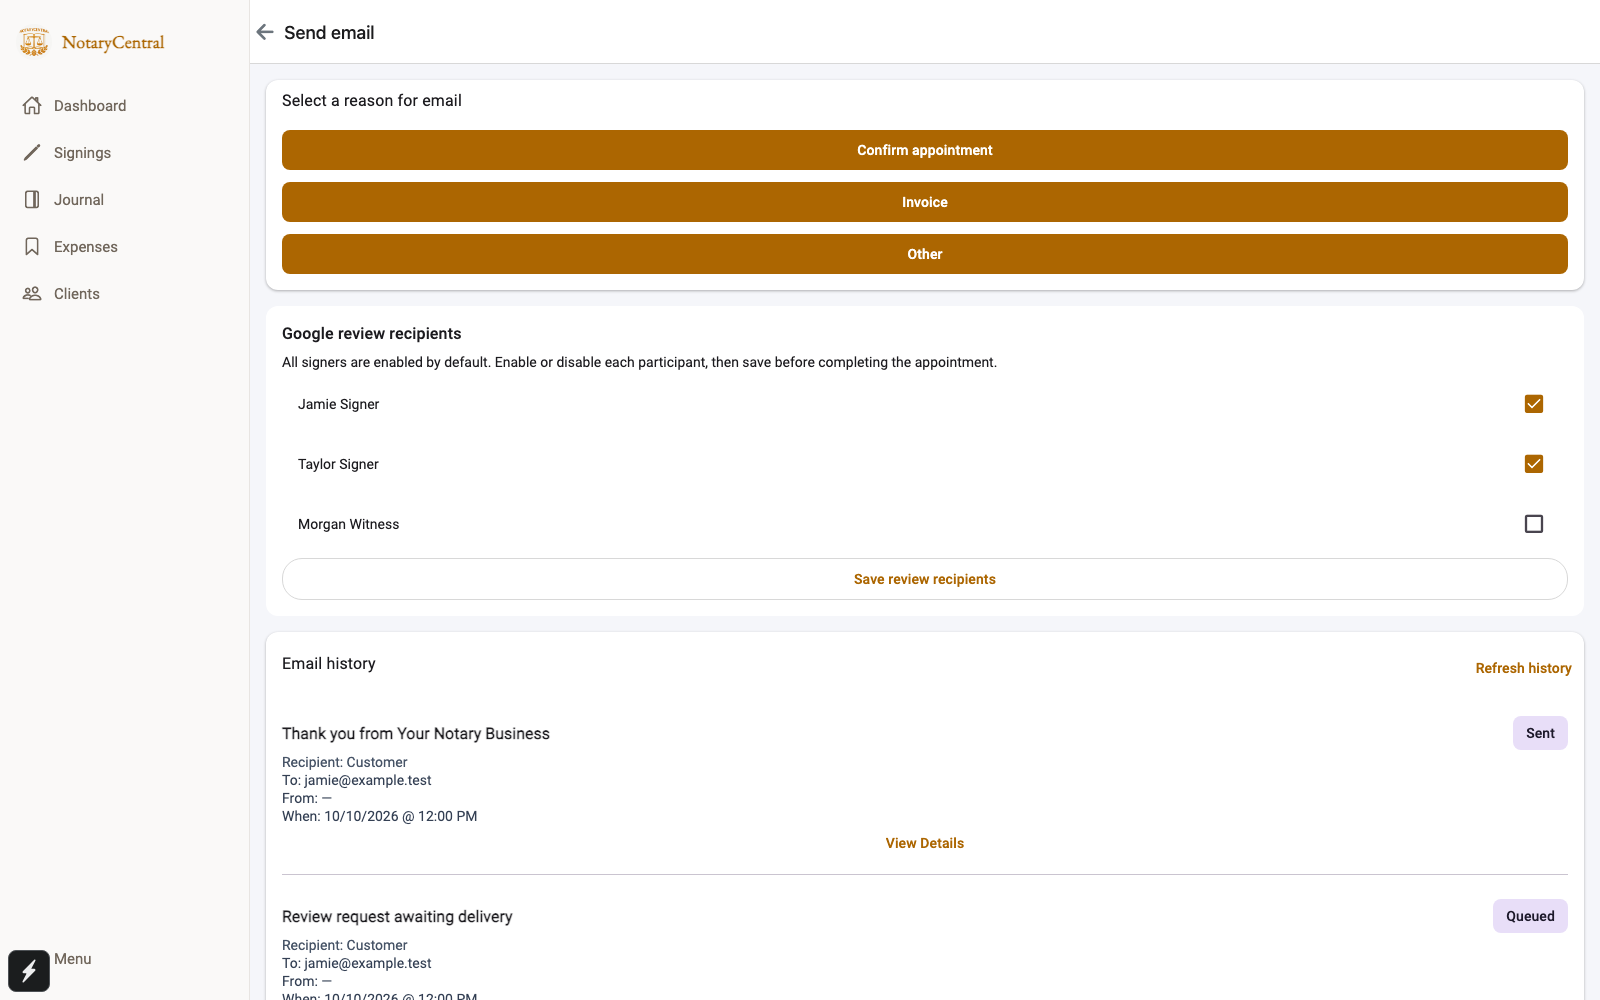
Enable or disable each participant, then select Save review recipients before completing the appointment. You can choose one participant, several, or none. Selecting nobody prevents review emails for that appointment. The payor is not automatically substituted for a recipient.
Check each selected participant's email address in their customer or participant details. If one recipient has no usable email address, that recipient is skipped; other eligible recipients can still receive their emails. Recipient selection closes once the appointment's review requests are finalized.
Mark the appointment Closed - Complete only after a successful appointment. Each selected, eligible participant receives at most one automated review request for that appointment. Reopening and completing it again does not send another round of emails.
7. Check delivery history
Return to the appointment's Email screen and select Refresh history. The history shows each recipient's request and its current state.
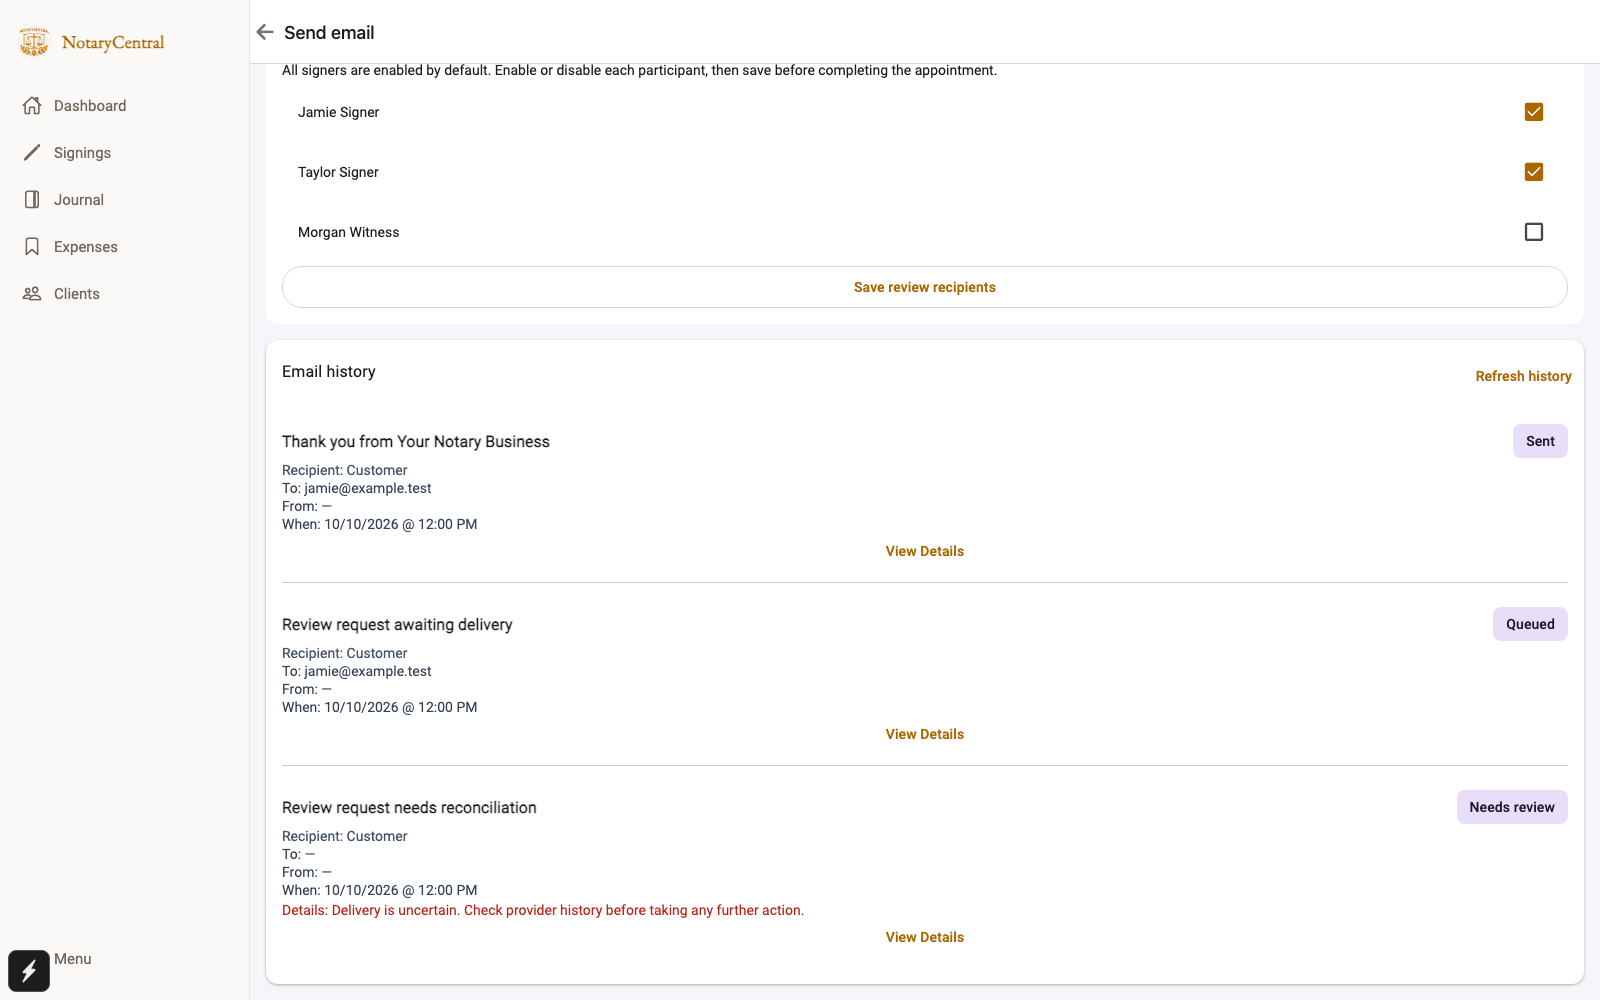
| State | What it means and what to do |
|---|---|
| Queued | Waiting for delivery processing. Refresh history shortly. |
| Sent | The email provider accepted the message. This does not confirm that the customer opened it or posted a review. |
| Skipped | No send was made. View details for the reason, such as disabled automation, missing email, no selected recipients, or a reopened appointment. |
| Failed | Delivery encountered a failure. View details and correct the cause for future appointments. |
| Needs review | Delivery is uncertain. Ask support to reconcile provider history before arranging another customer email. |
An email failure does not undo a completed appointment. Correcting settings or an email address later does not automatically resend a skipped request.
If something is missing or does not work
- No thank-you template: Confirm you have the current app version and ask NotaryCentral support whether the feature is available for your installation.
- Settings are read-only: Ask a workspace owner to configure and enable the business's template.
- Google link is rejected: Use an HTTPS Google review link copied from your Business Profile.
- QR upload fails: Check the image format and size. You can save and enable the automation with the review link alone, then ask support to check image storage.
- No email after completion: Check that automation was saved as enabled before completion, recipients were selected, their email addresses are present, and the status is Closed - Complete. Refresh history and view the recorded reason.
Continue with appointment reminders for communication before the appointment, or return to the onboarding hub.