When you first access the app, you’ll complete a short Account Setup form. It collects core business and profile details so your workspace is configured correctly from day one.
If you want the full onboarding path at a glance, start with the User-Friendly Onboarding hub.
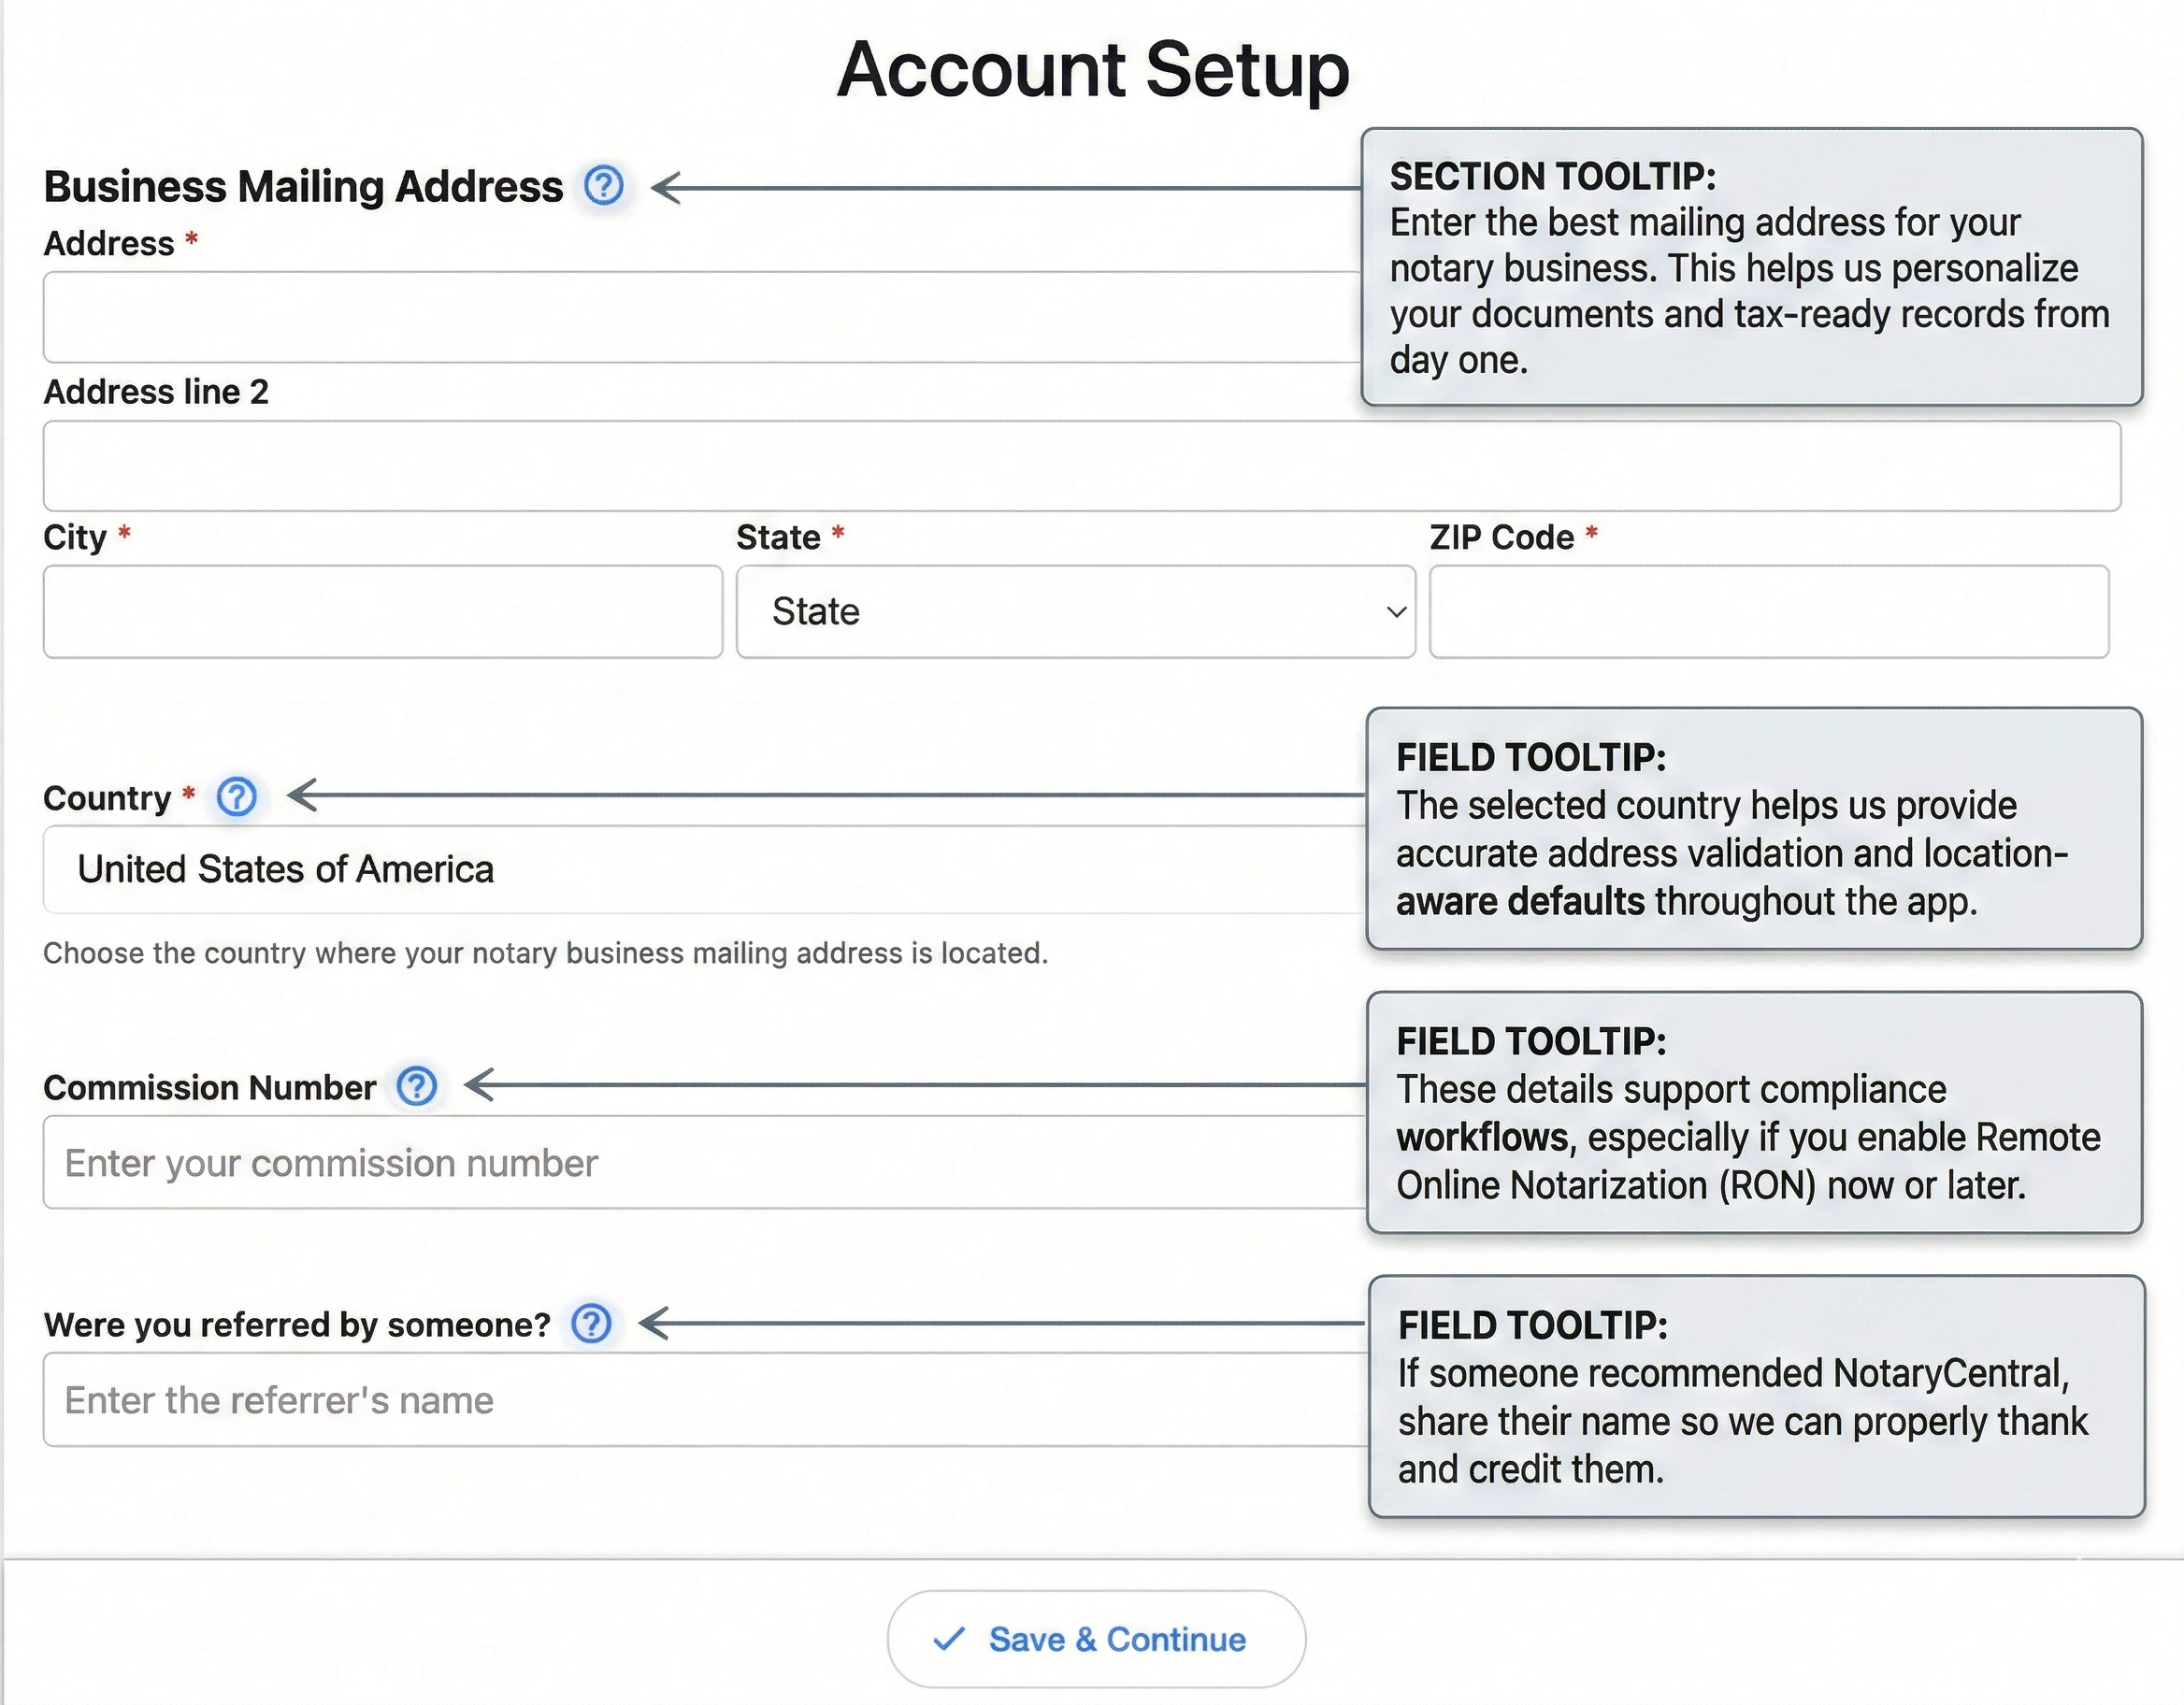
What you’ll be asked for
1) Business mailing address
You’ll enter your primary business mailing address, including:
- Address line 1 (required)
- Address line 2 (optional)
- City (required)
- State (required)
- ZIP Code (required)
This address is used to personalize your documents and support accurate business records.
2) Country
You’ll choose the country where your notary business mailing address is located (required).
This helps the app apply location-aware defaults and address validation.
3) Commission number
You can enter your notary commission number (optional).
Providing it supports compliance workflows, especially if you use or plan to enable Remote Online Notarization (RON).
4) Referral information
You can share whether someone referred you (optional).
If applicable, enter the referrer’s name so the team can acknowledge and credit them.
Technical preparation
To ensure you can host sessions and manage credentials without interruption:
- Verify your setup: Review System requirements for notaries to confirm your internet and hardware are ready.
- Go digital: Access Everything a Notary Needs to Go Digital to prepare your verified digital certificate, seal, and stamp.
Before you tap “Save & Continue”
To speed up setup, keep these items ready:
- Your business mailing address
- Your country
- Your commission number (if available)
- Referrer name (if someone referred you)
Once submitted, you can continue into the app with your account configured for your business profile.
Need the bigger picture for your first week? Visit the User-Friendly Onboarding hub for setup, calendar, and support next steps.
Open these pages in Notary Central
- https://app.notarycentral.org/
- https://app.notarycentral.org/dashboard
- https://app.notarycentral.org/logout
- https://app.notarycentral.org/impersonation
- https://app.notarycentral.org/invite/accept
- https://app.notarycentral.org/link-view
- https://app.notarycentral.org/new-appointment-type
- https://app.notarycentral.org/new-category
- https://app.notarycentral.org/new-email-template
- https://app.notarycentral.org/_layout
- https://app.notarycentral.org/+html
- https://app.notarycentral.org/+not-found