In NotaryCentral, registering an appointment starts with the signing form. You’ll move section-by-section through Service, When, Where, Payment, and Follow-up so every appointment is complete and easy to track.
If you’re new to the platform, review the Getting Started guide first.
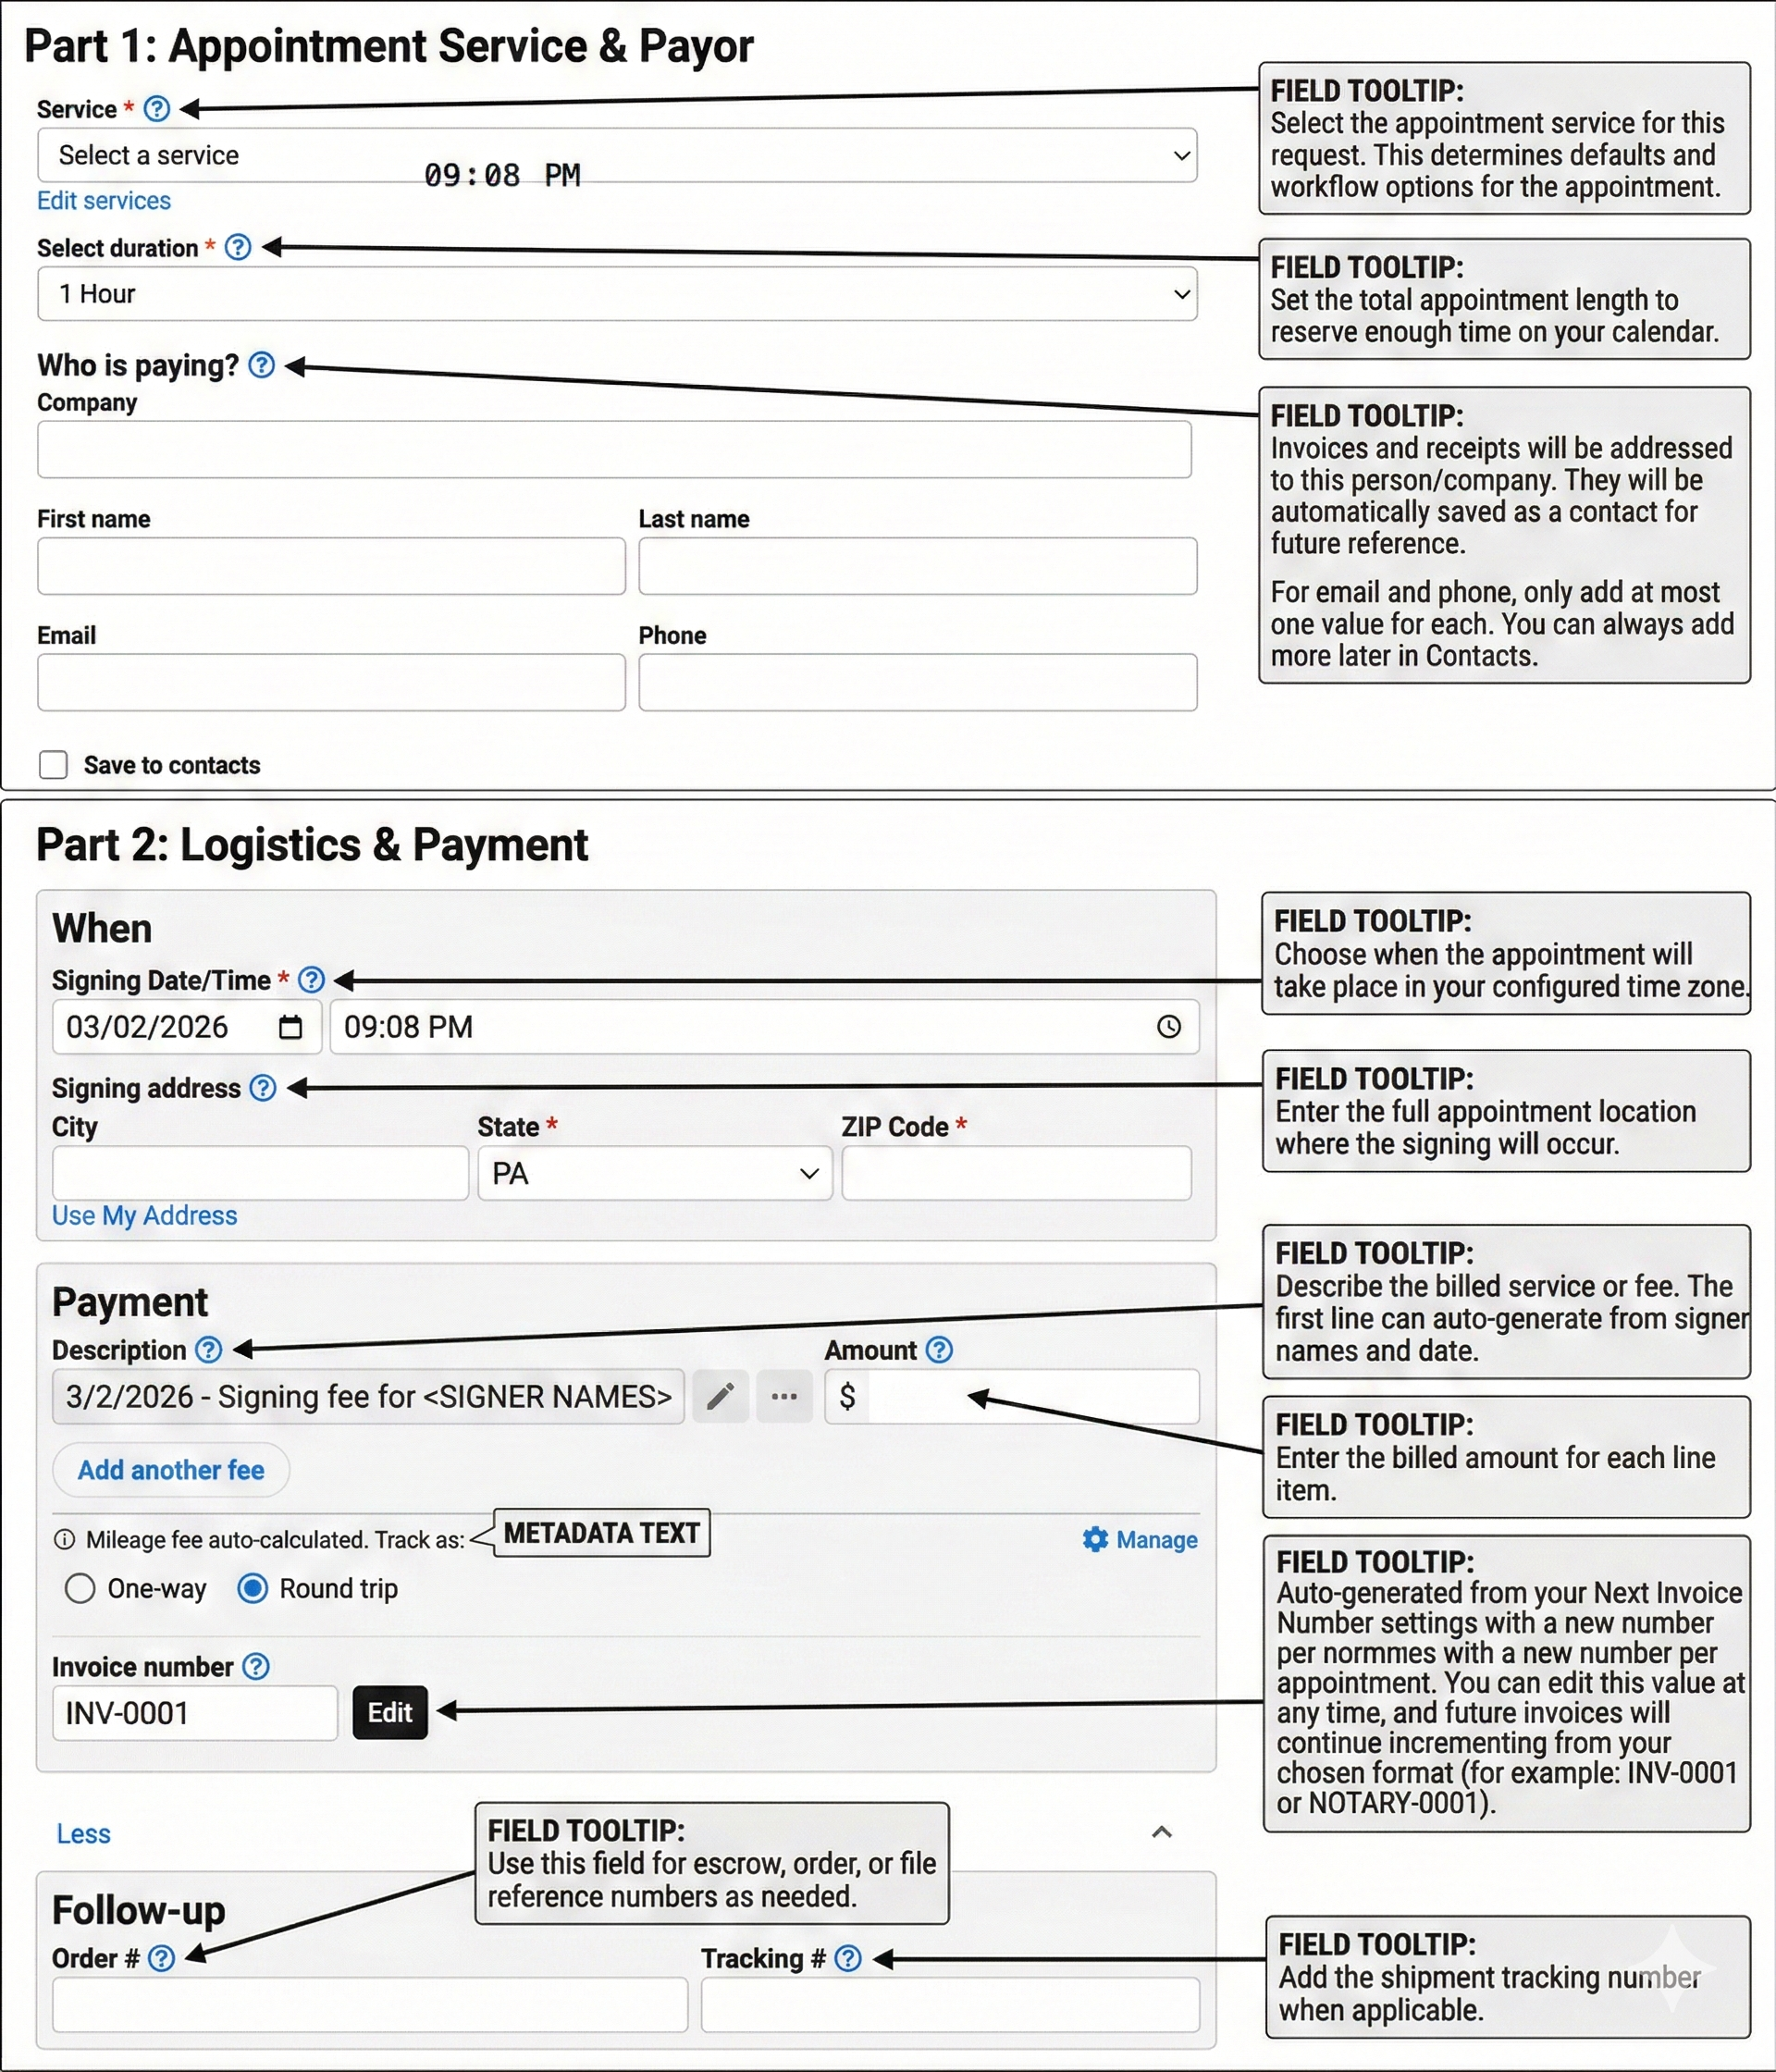
Appointment form sections
1) Service
Start by choosing the appointment service and confirming duration.
- Service: Select the appointment type that matches the request.
- Select duration: Choose the total time to reserve on your calendar.
- Invoice number: Auto-generated from your settings, but editable when needed.
- Payer: Enter who is responsible for payment and invoicing.
2) When
Add when the appointment is scheduled.
- Signing Date/Time: Set the appointment date and time in your configured time zone.
3) Where
Capture where the signing takes place.
- Signing address: Add the full appointment location.
- Remote online notarization (if applicable): Mark whether the appointment is a RON session.
4) Payment
Document what will be billed.
- Description and Amount: Add at least one fee line item.
- Add another fee: Include additional billed items when needed.
5) Follow-up
Store references and notes for execution and aftercare.
- Order # and Tracking #: Save escrow, file, or shipping references.
- Special Instructions: Capture access notes, signer instructions, or handling details.

Before you tap “Save”
Use this quick checklist:
- Confirm the selected service and duration.
- Verify date/time and address accuracy.
- Review payer and line-item amounts.
- Add order/tracking details or special instructions if needed.
Once saved, your appointment is ready for calendar visibility, invoicing, and workflow follow-up.
Automating post-registration communications
For Remote Online Notarization (RON) sessions, you can save even more time by automating the next step:
- Auto-Send RON Confirmation Emails — learn how to instantly send session invites and preparation instructions to signers as soon as you save the appointment.
Want the full onboarding sequence? Return to the User-Friendly Onboarding hub.